
As an entrepreneur you have to do a lot of things on yourself as you build your business. If you are an artisan selling online you likely need to take great product photos to showcase your fantastic work. A drab photo will not carry the brilliance of your product to buyers. On the flip side a fabulous photo can mean the difference between a buy decision and a pass.
I recently set up to photograph the first installment of my Root Chakra pieces from my ongoing Chakra Projekt. The first set of photos I took were less than inspiring so I set out to learn tips and tricks to getting better shots.

Here’s a summary of what I learned the hard way so you can skip some of the trial and error and be successful much faster.
1. Choose a phone with a good camera. This is not a review of phones and camera options but I can say that starting with a decent camera will get you half way to your destination or destiny as it were. In this example I am using an iPhone 13 Pro Max. For a recent review of the top mobile devices for cameras out this review.

2. Lighting is key! My first set of photos relied on lighting from a photo box set to the dim setting. I learned the hard way that more light is better, diffused light and natural light are preferred! The light box is convenient for me because I only get good light in my apartment during the morning so in order to shoot at other times I need an artificial set up. I used the Photo Box 16″ x 16″ Quick Install Foldable Portable Studio Kit with Soft Light Cloth Professional Photography Equipment Adjustable White Light, Soft Light, Warm Light available on Amazon.
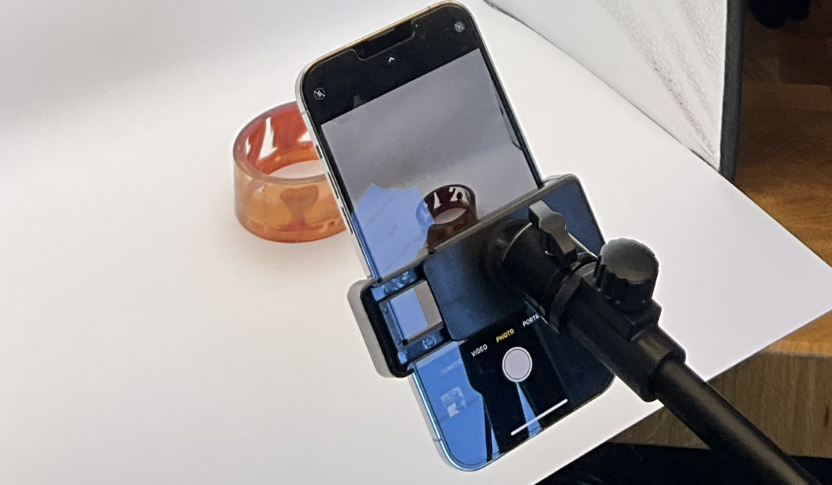
3. Use a tripod. At first I tried holding the phone by hand and got a blurry effect. A tripod makes sure your camera is perfectly still during the shot. I also makes it possible to recreate the same angle for different products by swapping out the products without changing the position of your camera.
Tip: DO NOT use the zoom feature on your phone. Position your phone close to the object and you can crop later to adjust.

I chose a multi-purpose phone mounting tripod that also it’s own ring light attachment for shooting how-to videos as well as a selfie stick mount for positioning the phone below the ring light and for, well, selfies. I used the 10.5″ Selfie Ring Light with Stand and Phone Holder with Tripod Stand & Cell Phone Holder,Aluminum Overhead Arm Tripod LED Circle Lights for Live Stream/Makeup/YouTube/TikTok/Photo/Video Recording… available on Amazon.


4. Capture multiple angles. Make sure to show your product from multiple angles since your online buyers won’t be able to pick it up and turn it around IRL. Show them both sides, a top view, and show jewelry and apparel being worn so customers can picture them on.
5. Adjust in post-production. Once the photos are taken you are not quite done yet! You will likely want to make adjustments to them to make sure the color, background and cropping are all up to par. I used a combo of my phone’s photo edit features and Adobe Photoshop for iOS on an iPad Pro to get the final look.
If you want specific tips on post-production hacks let me know your questions in the comments. Also if you have any product photo tips or tricks feel free to share them as well!

Root Chakra Chunky Bracelet – Open Backed
With this Root Chakra Chunky Open Backed Bracelet you literally wear a reminder of the grounding energy of the Root. The Root Chakra symbolizes home and stability. This fun and stylish bracelet is great for dressing up casual fits as well as a statement piece for a more refined look. This is one of a kind hand-made from resin featuring gold and red sparkling mica.